Online form building is an easy, accurate, and convenient way to collect information from anyone anywhere. Form building services from wufoo.com can allow you to create a form for any need (event registration, wedding RSVP, customer satisfaction survey, order forms, etc.) without the hassle of trying to get paper forms to and from your audience. Not only can paper forms prove cumbersome, but they can be easily lost or misplaced resulting in the loss of precious data. Also, data from physical forms has to be manually analyzed, which is just time-consuming, inefficient, and ineffective.
Wufoo.com offers an all-around better form building and analyzing experience. You can easily create a new form using the drag ‘n drop feature or build off of one of the many form templates available. Form responses can be collected and analyzed anytime and from anywhere. Wufoo also gives users the options to collect payments, password-protect forms, track form performance using Google Analytics, accept file uploads, and even build custom reports. Not only is using wufoo.com for your online form building a no-brainer in terms of ease and efficiency, they offer a variety of plans and prices (including a free option) depending on your needs.
To create a new form using Wufoo, follow these steps…
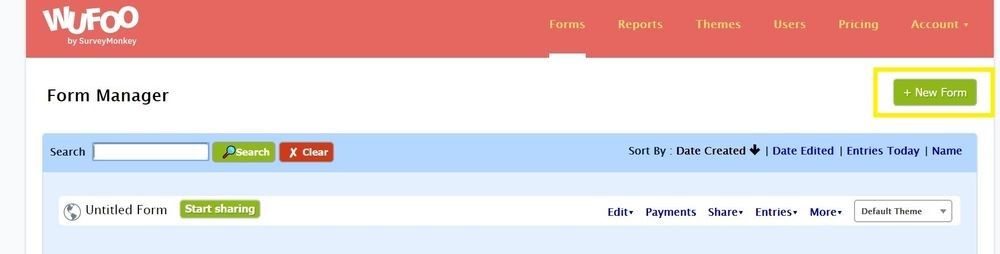
1) Go to wufoo.com and click “Login”
2) Login using your username and password or sign up
3) Click “New Form”
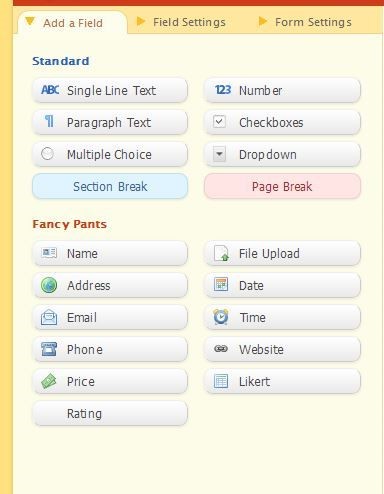
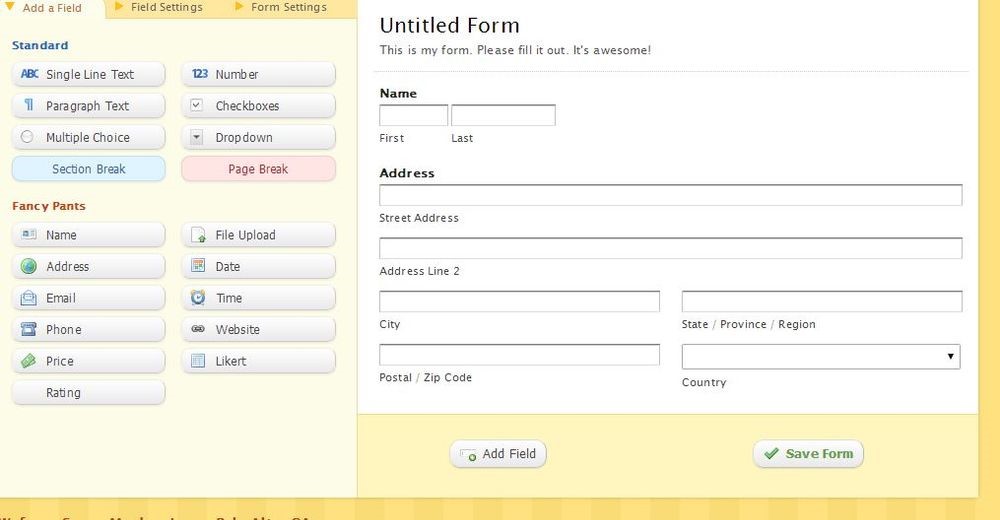
4) Add fields as needed by dragging a field to the area of the form where you want it to appear or by clicking on the field to have it appear on the form
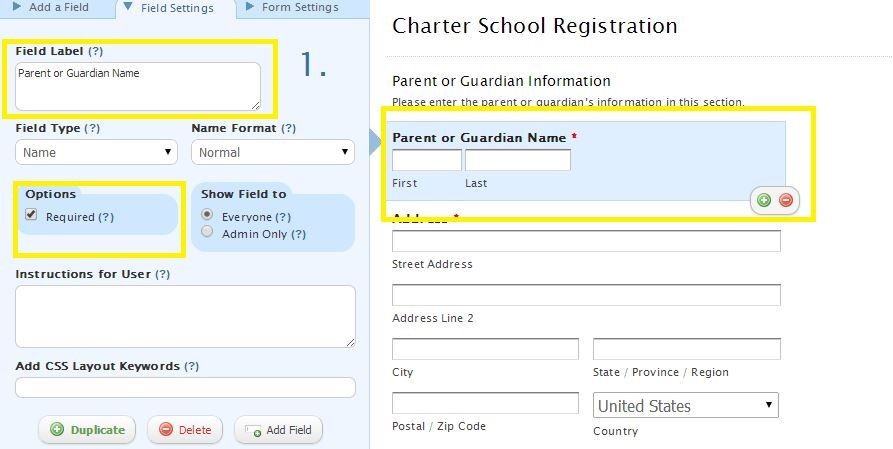
5) Click on a field to make edits
Clicking on a field will bring up an edit option on the left hand side of the window. From here you can edit the field label and/or mark the field as required.
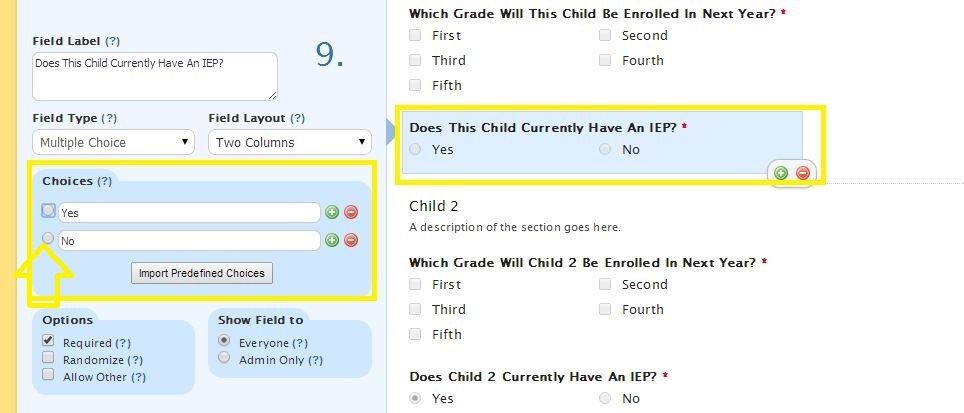
6) Edit multiple choice fields to select a default choice
On any field with a multiple choice question, you can have the form default to one of the multiple choice options when the form loads. You can also have the form to default to not pre-select any of the choices.
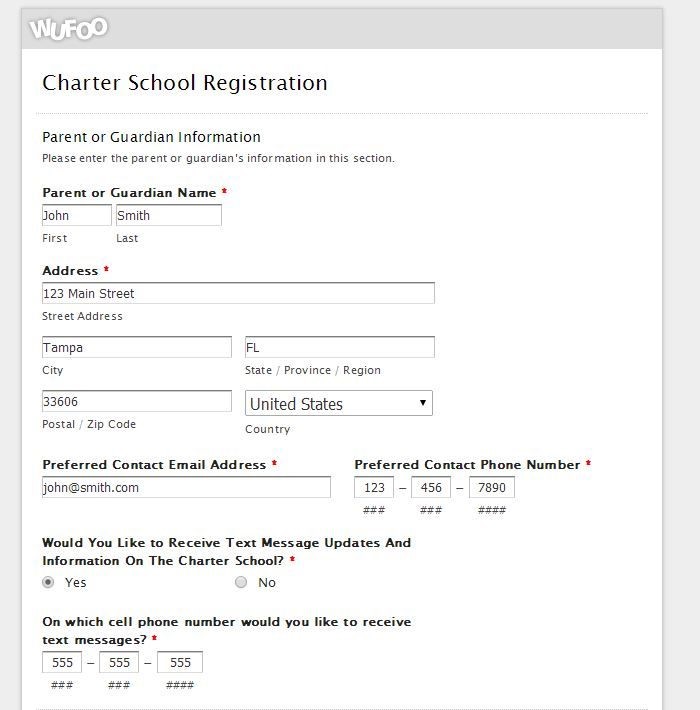
In the example below, we are choosing to have the form not pre-select any of the multiple choice options for the “Does This Child Currently Have An IEP?” question. If you wanted to form to default to the “No” option, you would click the radio button next to it under the “Choices” menu under the “Field Options” tab.
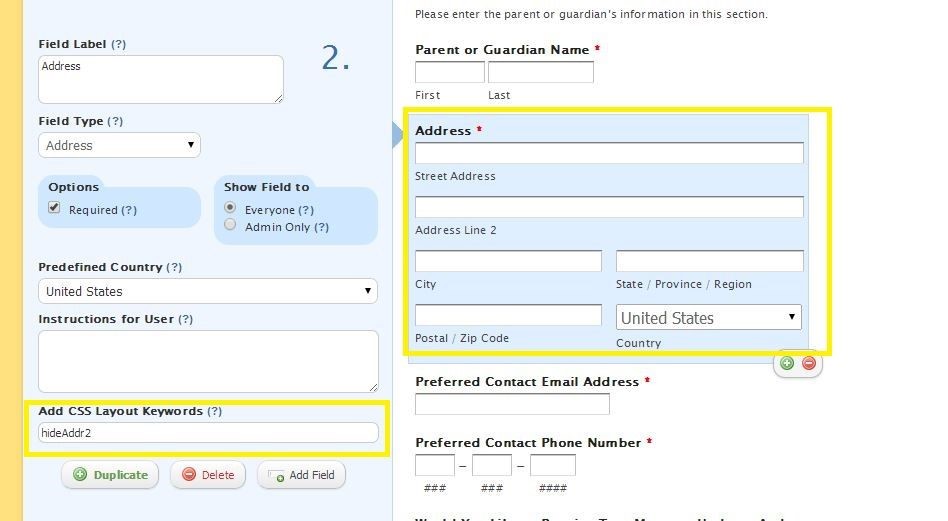
7) Use CSS Layout Keywords for further customization
- Click on a field to bring up the “Field Settings” pane
- Under the “Add CSS Layout Keywords” you can add in CSS keywords that customize the form. In this example we are using the CSS keyword “hideAddr2” to hide “Address Line 2” in the “Address” field.
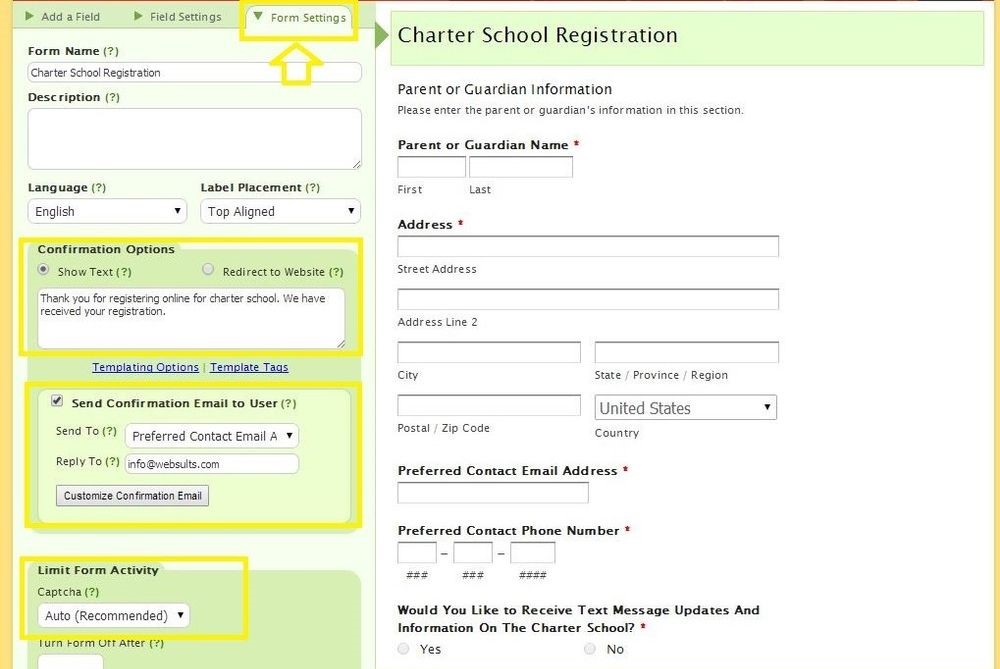
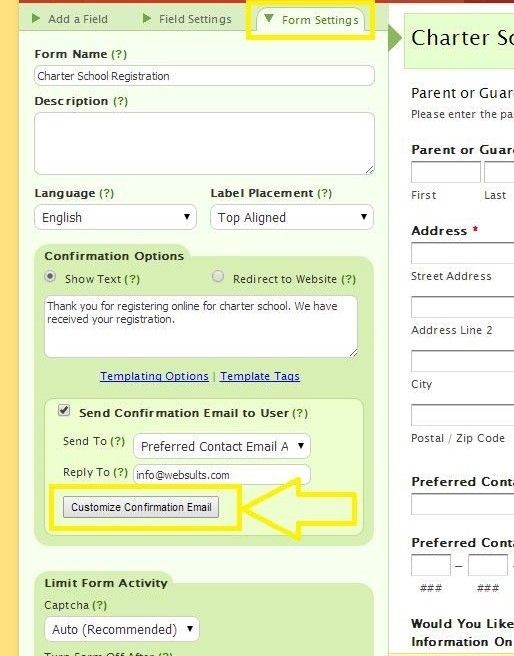
8) Edit the Form Setting
At the top left of the editing page, click the tab that says “Form Settings”
This will bring up options about confirmation emails and Captcha.
Ensure that you have text or a website to bring the user to after they have completed the form.
If there is an email field, you can opt to send a confirmation email to the user upon completing the form. Choose the email address field in the form for the “Send To” address. For the “Reply To” address, enter the company’s email address that will be receiving form submissions.
Set Captcha to “Auto”
9) Customize the email address going to the user
- Click the “Form Settings” tab at the top left of the edit pane
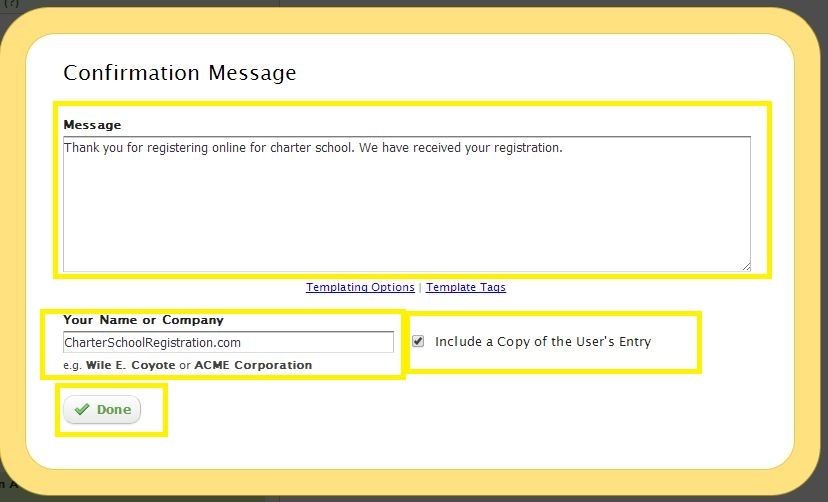
- Click “Customize Confirmation Email”
- Edit the confirmation message text in the “Message” field
- Enter the company name in the “Your Name or Company” field
- Check the box for Include a Copy of the User’s Entry” to have the user’s
completed form emailed to them in the confirmation email - Click “Done”
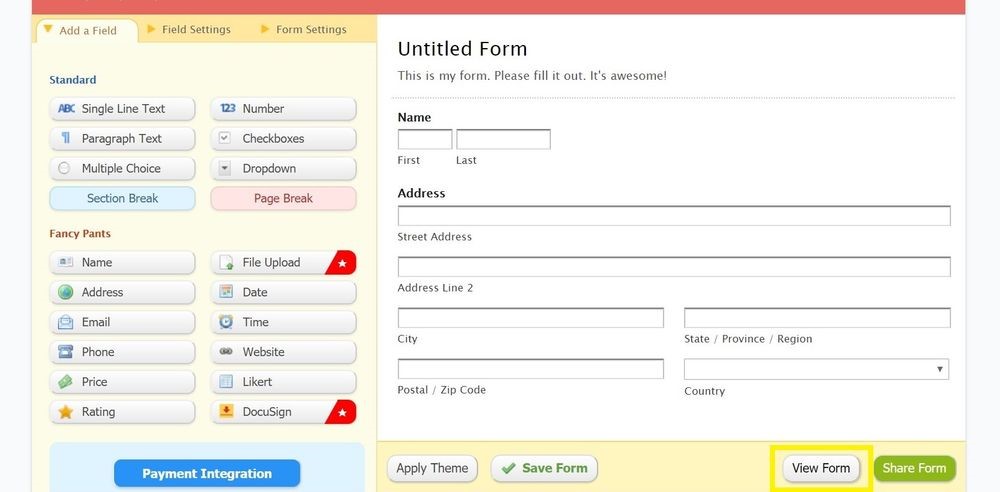
10) View the live form by clicking “View Form” at the bottom of the form draft
11) Check and test the form
- Check the form for any errors or typos
- Test the form — fill out the form with test information
- Verify that the form is sending confirmation emails correctly